")
Do you occur to have the PERFECT present to provide to your beloved, however perhaps you simply want a brilliant cute field to place it in? Don’t fear, I’m right here for you!
This tremendous cute DIY shock present field might be your new favourite option to wrap your tiny presents. 🙂
Cute DIY Shock Present Field Cricut For Your Liked One (+ SVG)
Do you ever get bored with shopping for luggage which are means too huge for small easy presents like present playing cards? Or perhaps you need to actually give one thing to your family members that you just made and has your entire coronary heart wrapped up in it. <3 Belief me, I get it. I used to be too! These containers aren’t solely actually cute however sensible, and can be utilized all 12 months spherical for special day presents and even “simply because” presents.
This DIY present field is tremendous simple to make and the design means it has a built-in lid! I’ve received a step-by-step instruction record so that you can observe, and when you get the dangle of it, you’ll be making and utilizing these containers for present concepts on a regular basis!
These present containers are good for little presents similar to present playing cards, candies, love notes, and tons extra! And these aren’t only for a particular somebody (husband, boyfriend, spouse, girlfriend and so forth), but additionally for your children. You possibly can fill these with little jewels/treasures, stickers, kid-friendly sweet, and different little treats that they might love.
These containers are a good way to remind somebody how a lot you like them and are pondering of them. 🙂 Alright, let’s get proper into it!
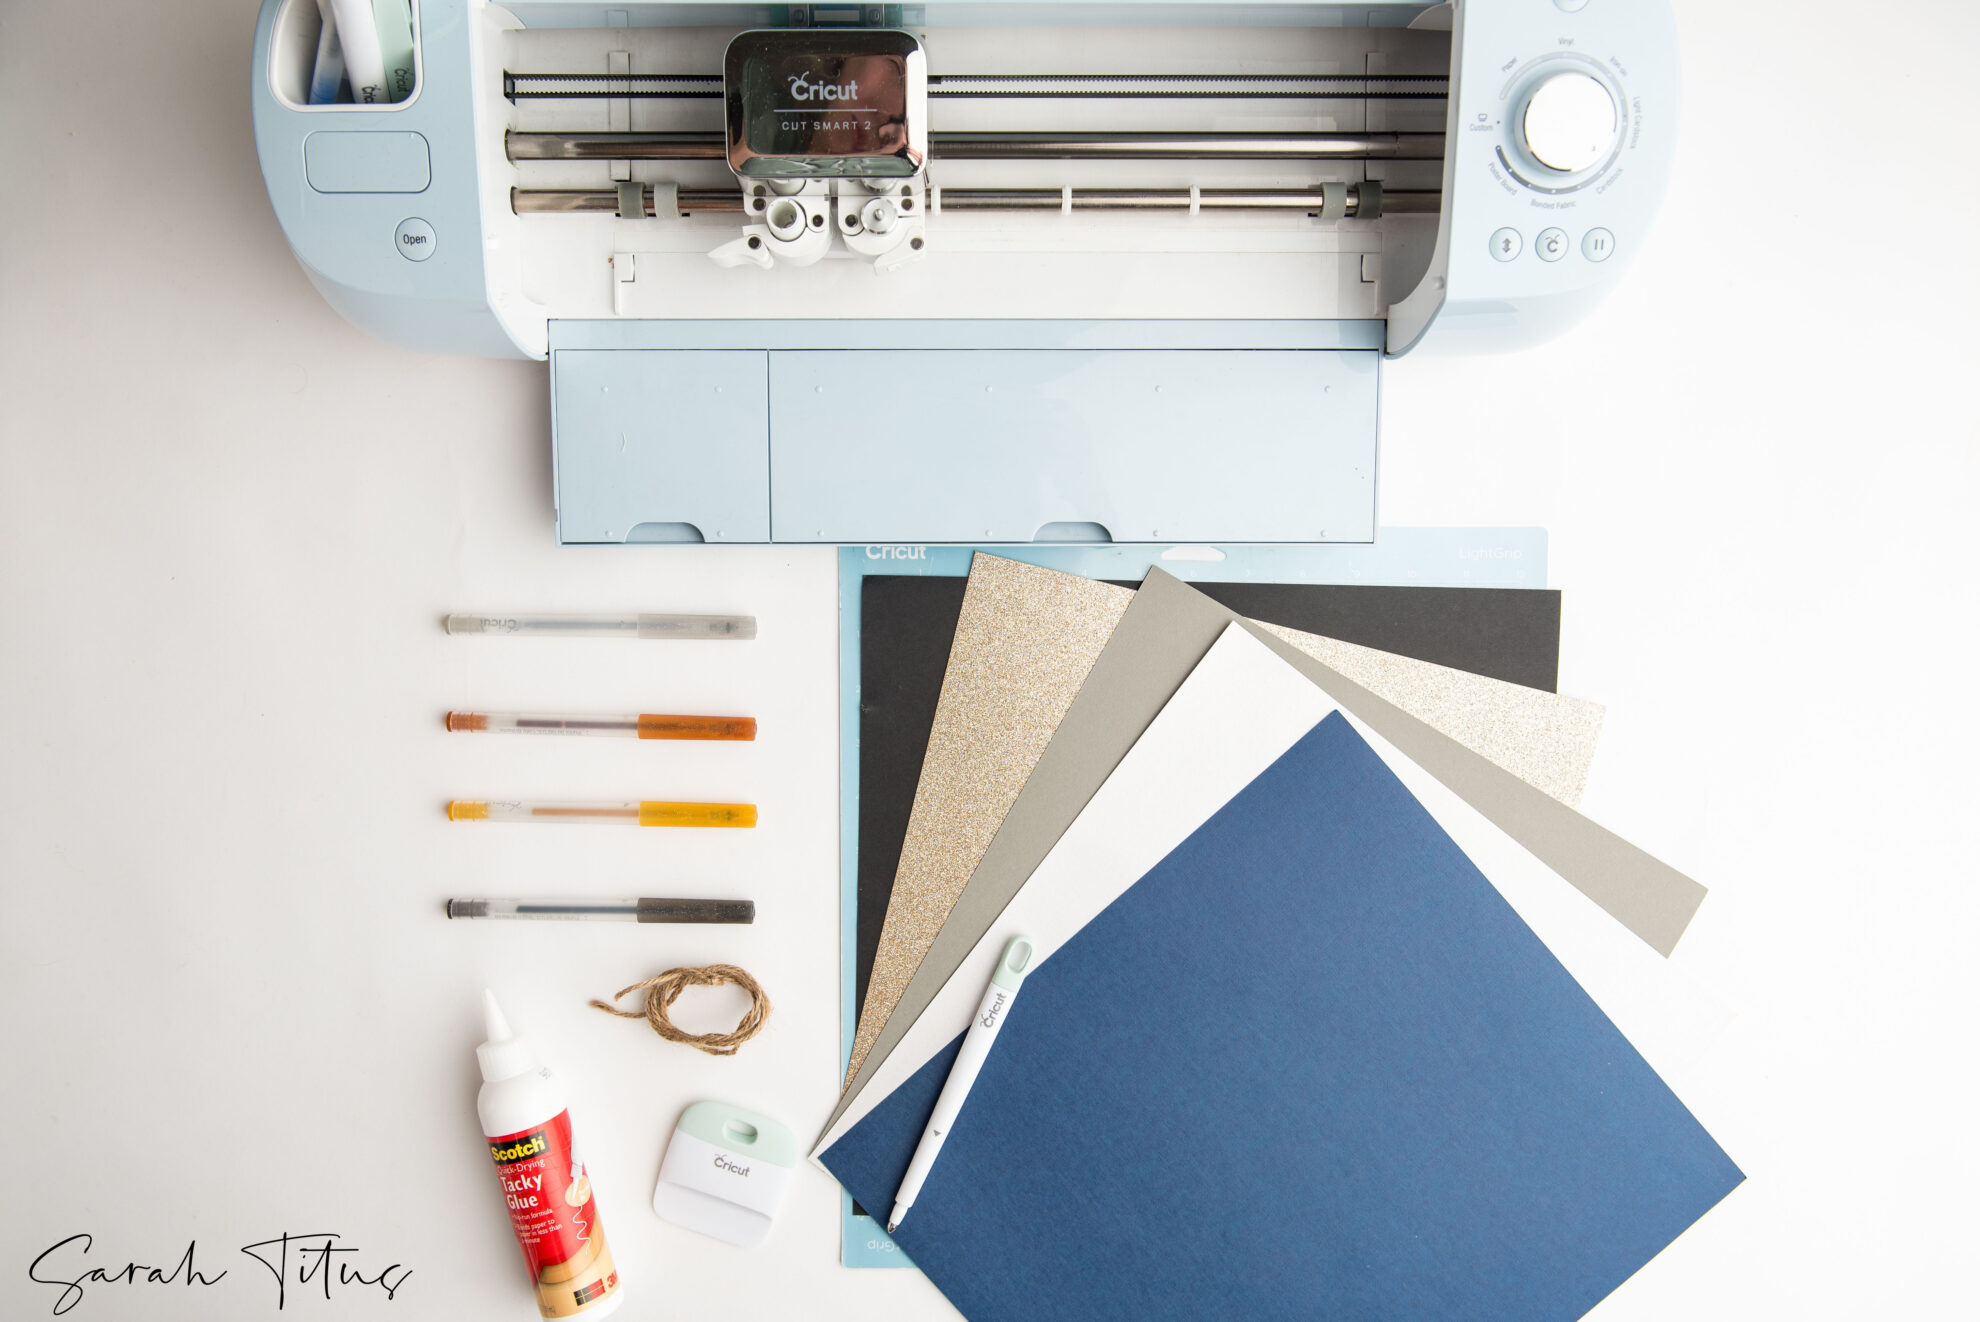
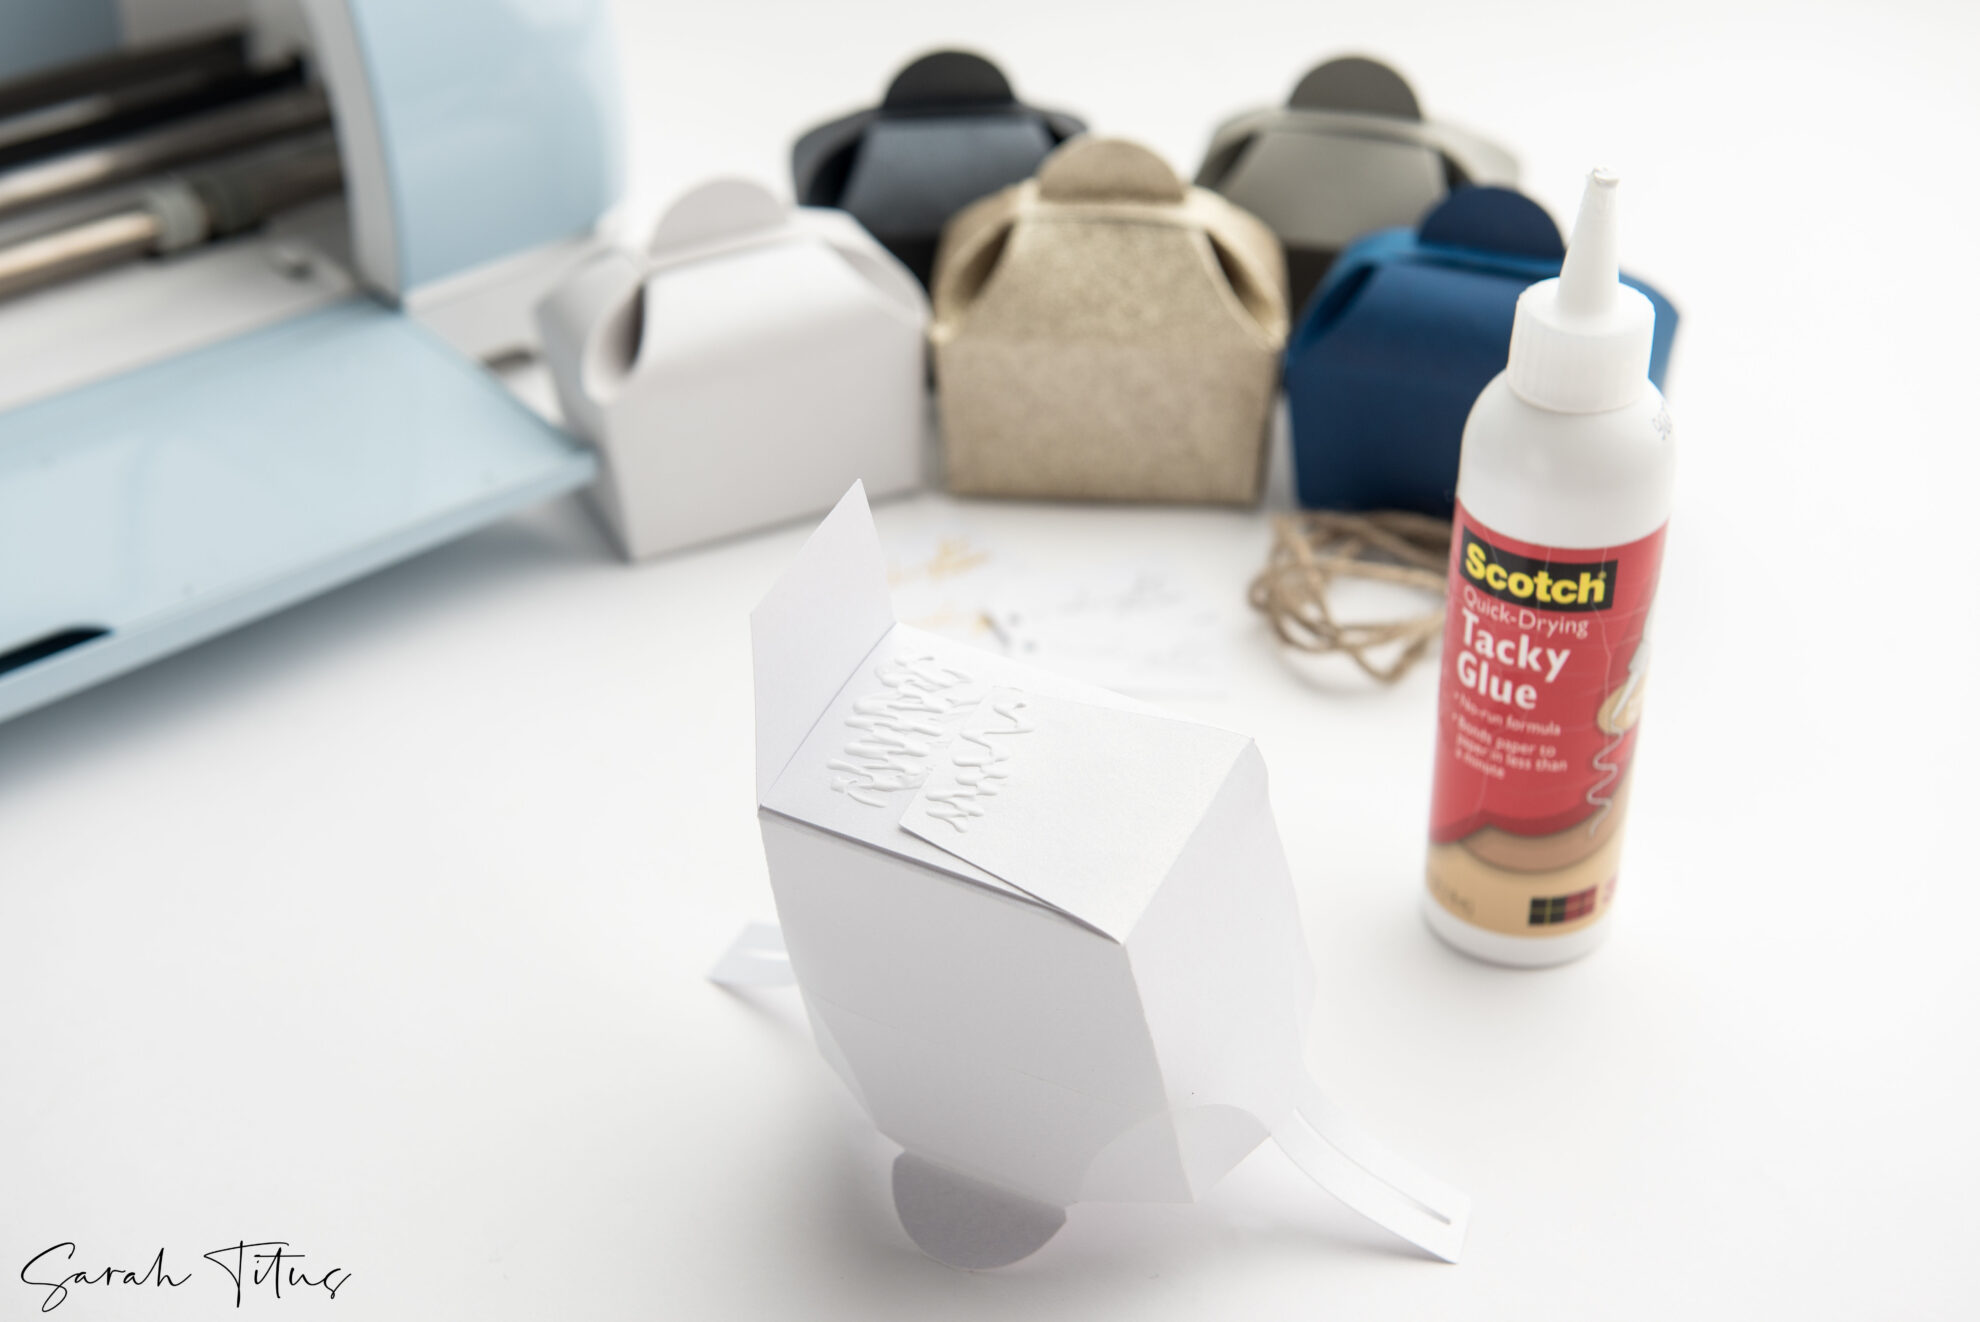
What you’ll want for this tutorial:
- Any reducing machine (Cricut, Silhouette, and so forth.)
- A minimum of 2 sheets of card inventory (12×12 works the very best – one field per sheet)
- Blue mild grip mat
- Scotch quick drying tacky glue (this works the very best for paper crafts because it has a precision tip)
- Cricut Scoring Stylus or scoring wheel
- Ribbon or twine
- Cricut glitter gels pens (I’m utilizing the essential pack with gold and silver)
- Entry to design house or design program
Pre-cutting – design house:
- In design house, add the SVG (here’s the template).
- Modify the sizing of your file to a width of 11.406” and peak will auto populate to roughly 7.198”.
For this subsequent half you should definitely see the design house screenshot in addition to the academic information (beneath) to you should definitely change all strains wanted for scoring. These will finally function your fold strains.
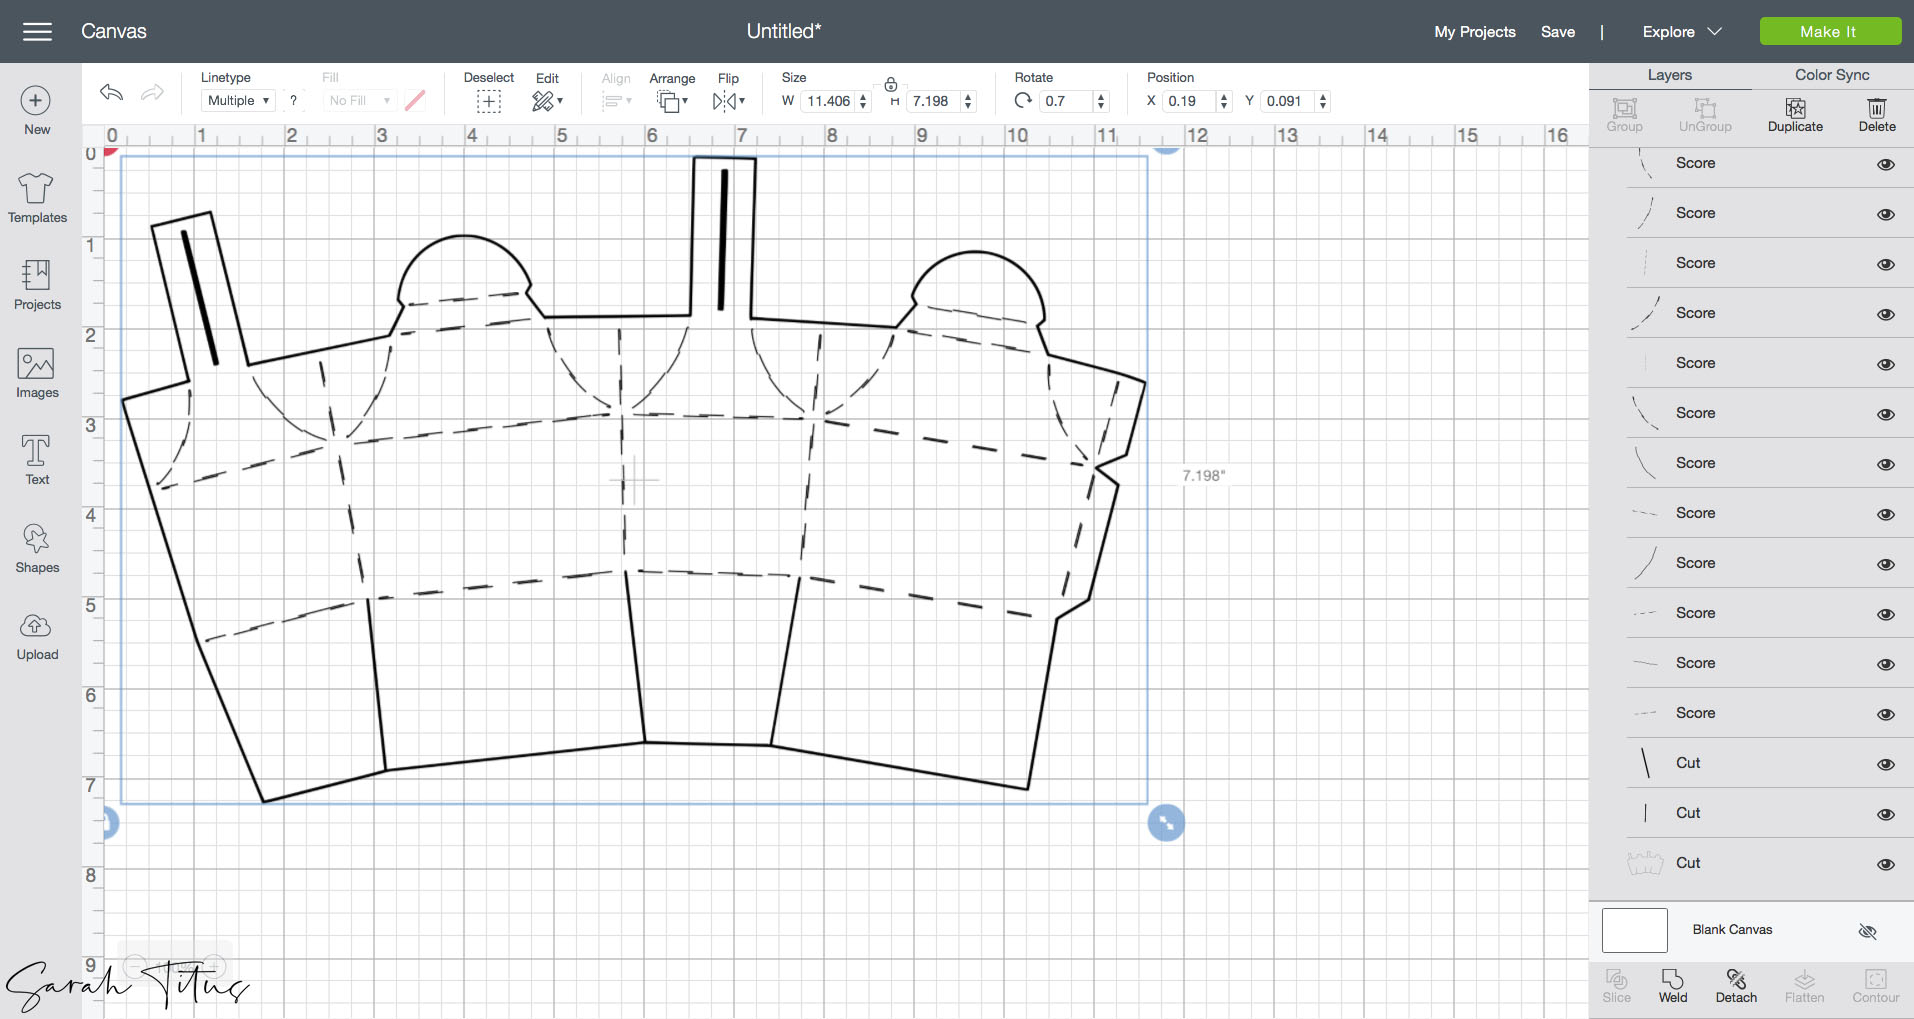
- In design house, you should definitely spotlight all of the fold strains. On the toolbar click on the down drop menu titled “line sort” and alter the fold strains to “rating”.
- BE SURE TO HIGHLIGHT ALL LAYERS ONCE SCORED AND HIT “ATTACH TO” BEFORE CUTTING. THIS IS IMPORTANT (in any other case, design house will need to reduce all strains individually somewhat than all collectively).
- Load your paper on the sunshine blue grip mat and your scoring stylus into the machine’s clamp A.
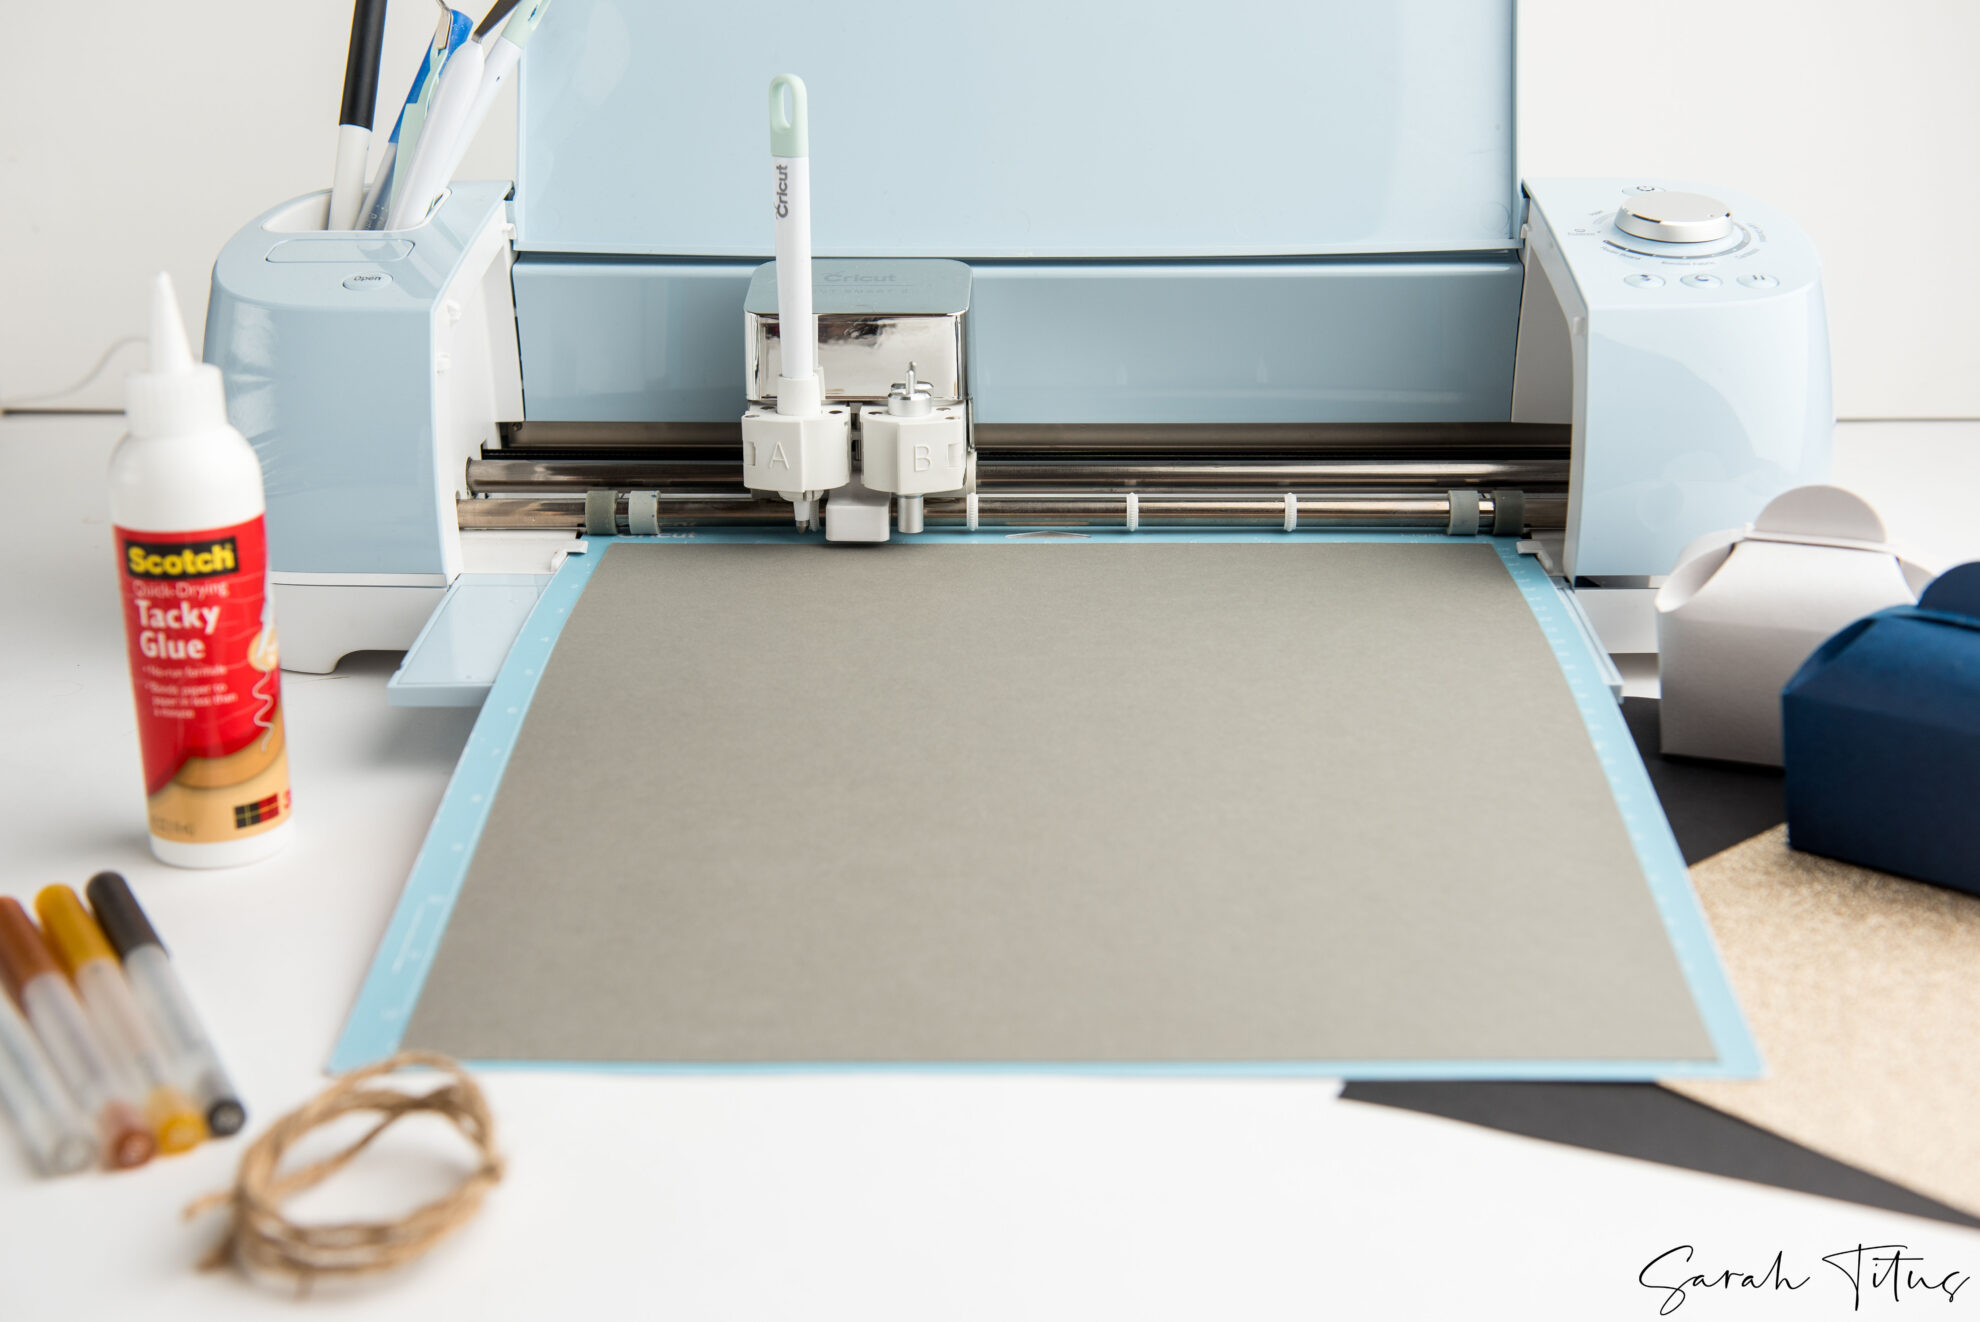
- Modify your materials dial to card inventory. If utilizing a heavier weighted card inventory be sure that to regulate strain.
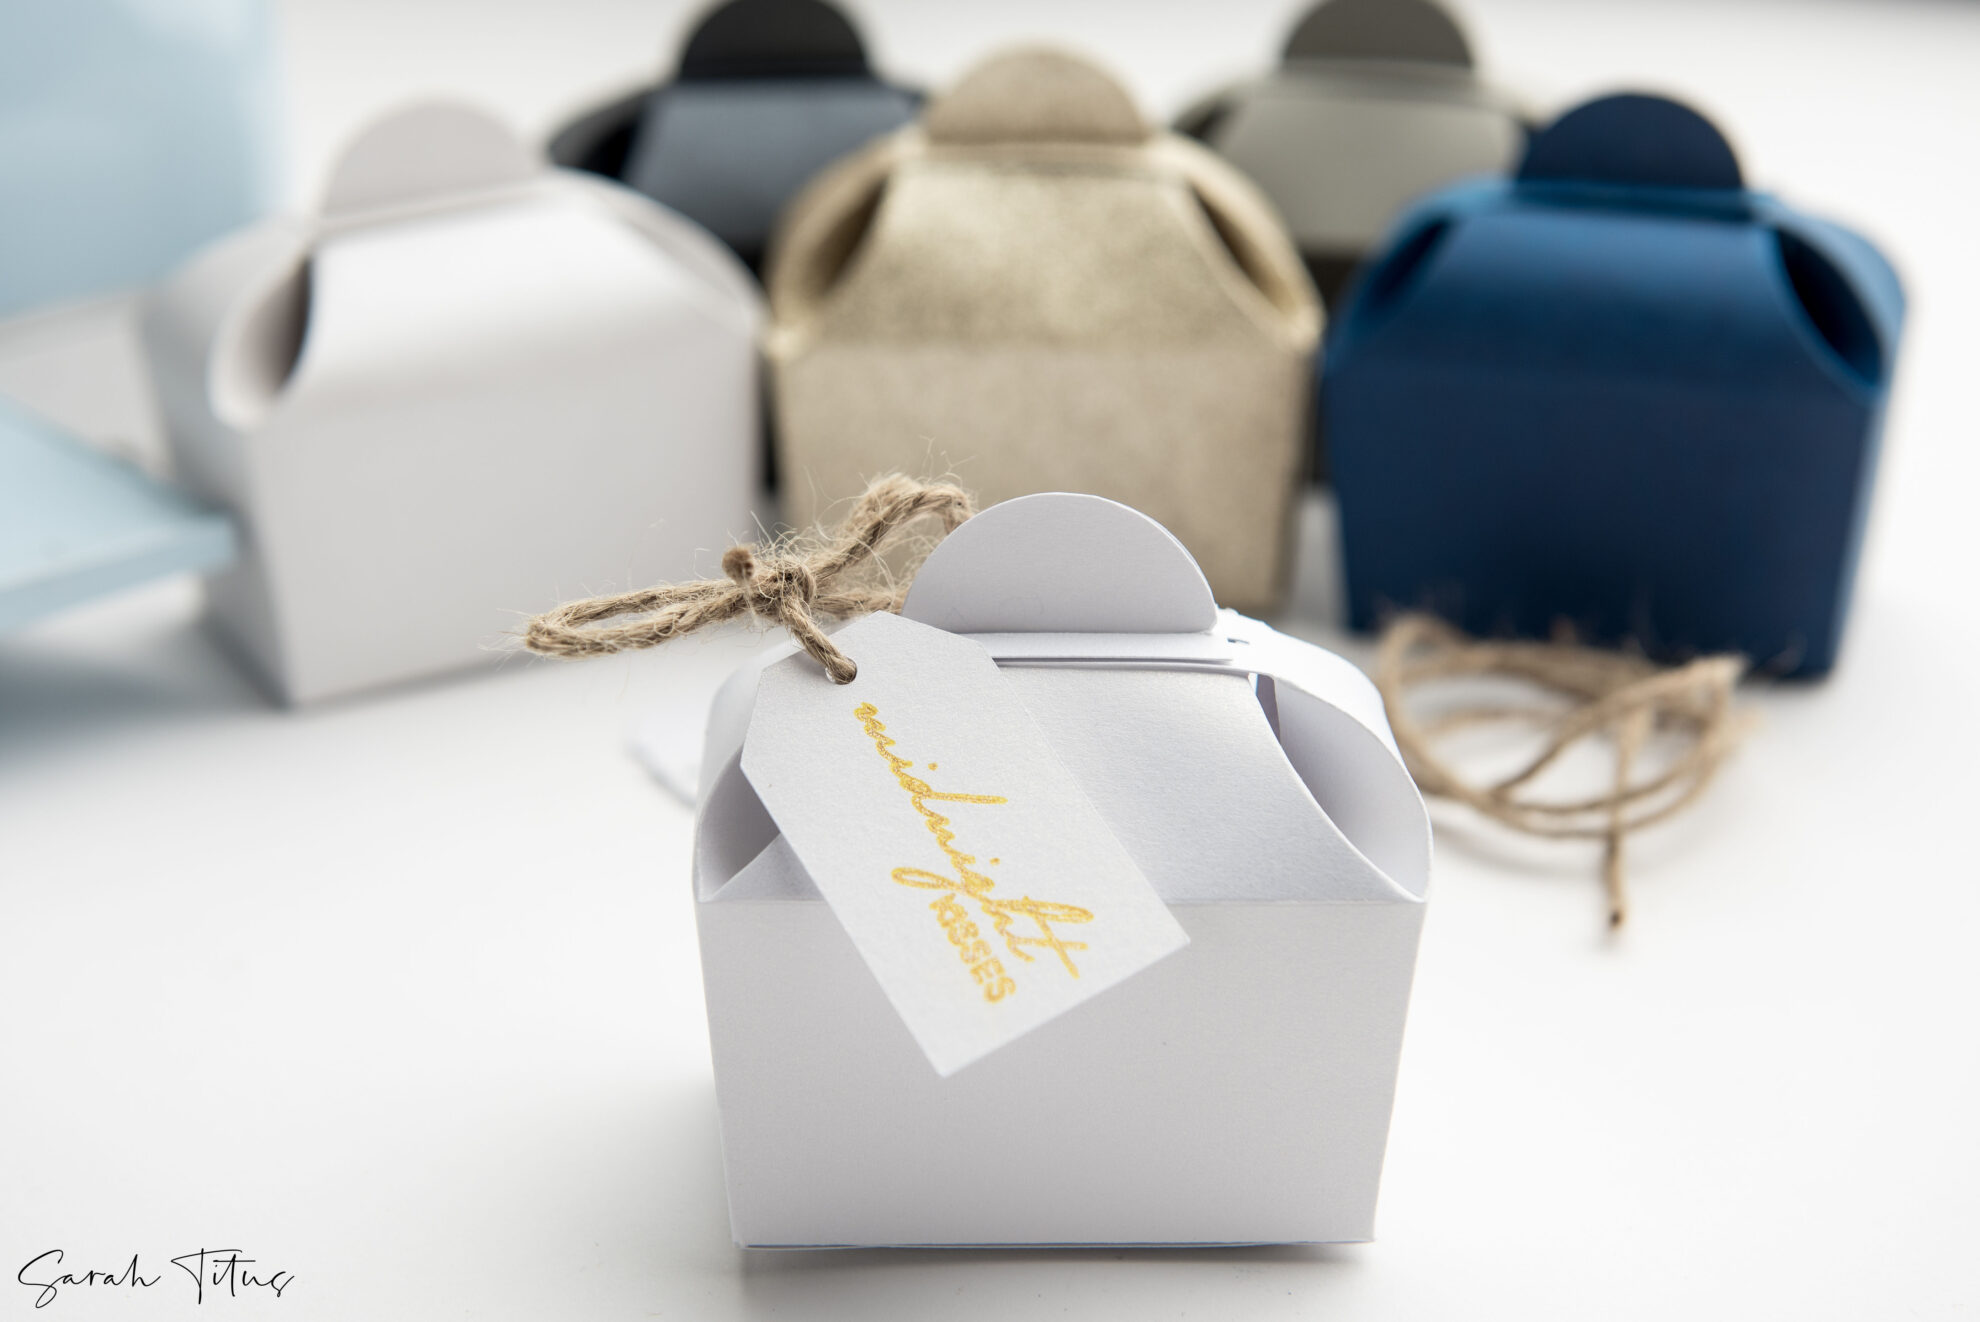
Tag – Lower and draw (non-compulsory)
- If including a tag (here’s the template), repeat the identical steps above. As soon as your clean tag SVG is uploaded you’ll alter the dimensions of the tag to roughly 1.9” large and 1.203” tall.
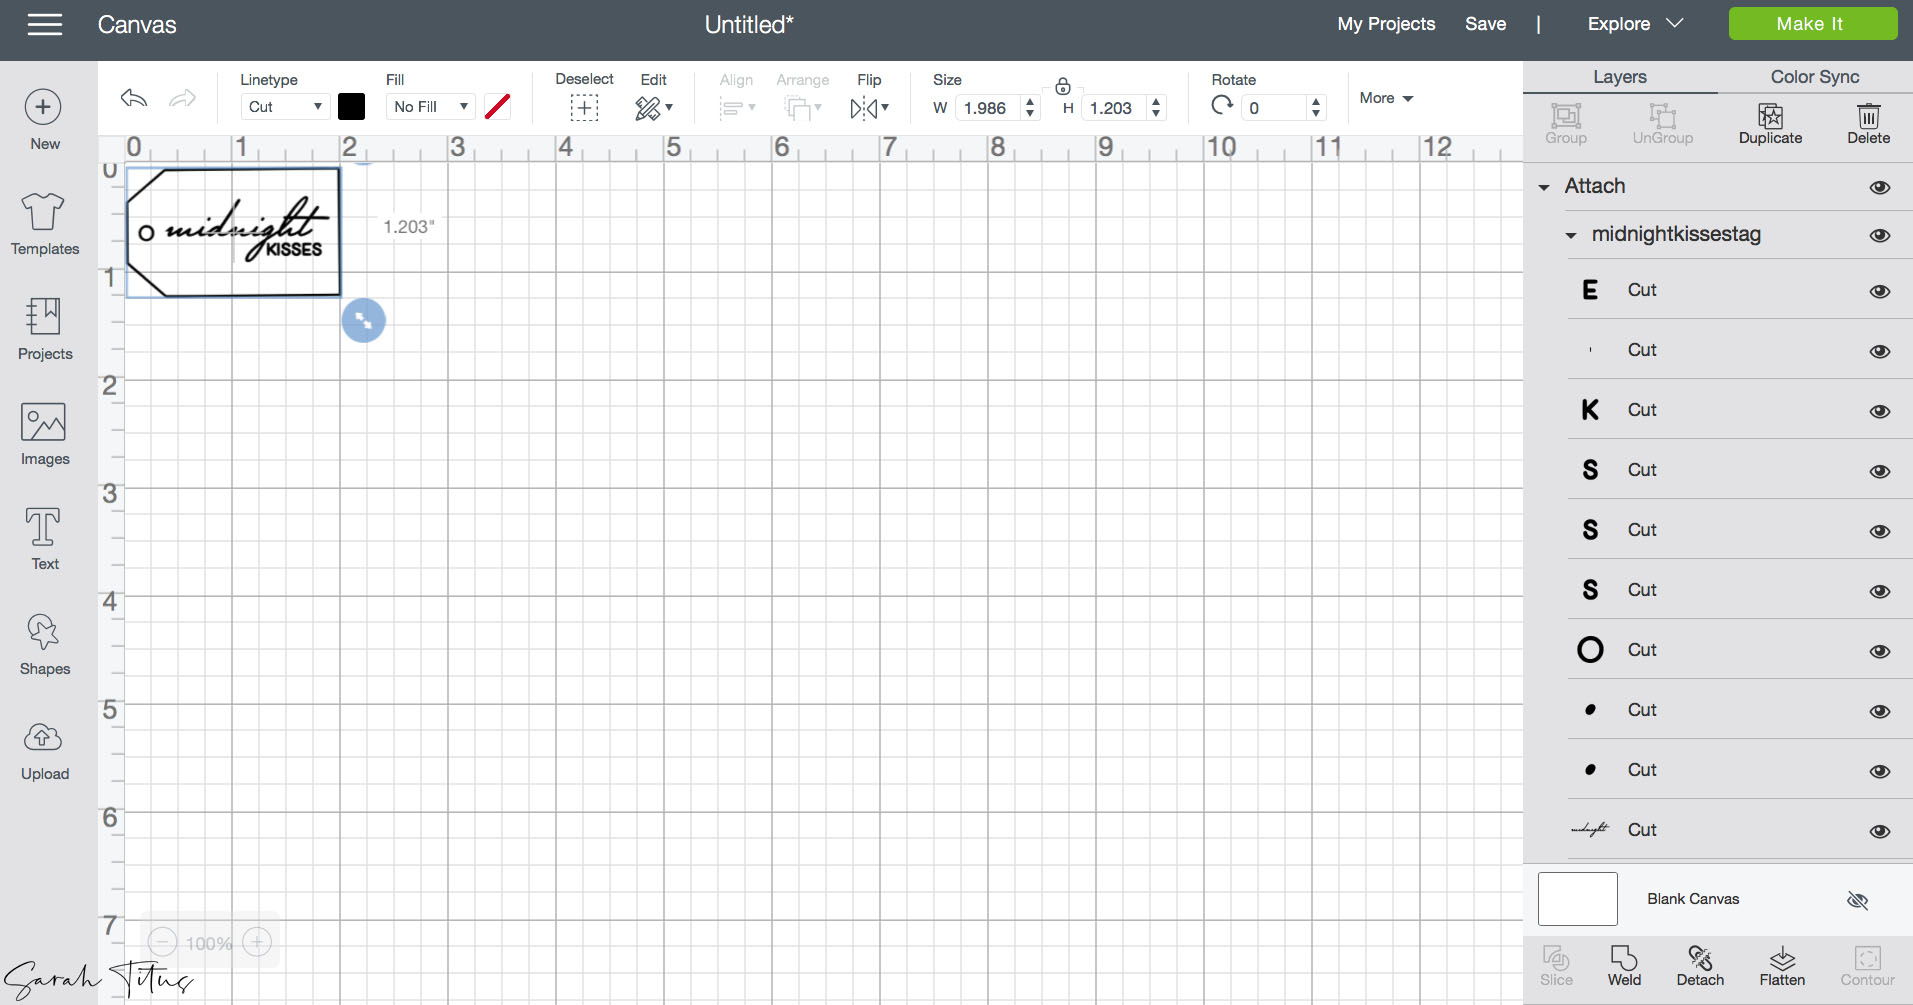
- Add any writing font that you desire to on your tag and transfer to the center. Make certain that it’s a skinny writing font (If you need to know what fonts I’m utilizing, they’re Mr. Sheffield for the phrase “midnight” and Helvetica common for the phrase “KISSES”). You will get Mr. Sheffield (for commercial use here and free for personal use here)
- Spotlight the font layer and on the highest toolbar change the down drop menu titled “line sort” from reduce to “draw”.
- BE SURE TO HIGHLIGHT ALL LAYERS ONCE SCORED AND HIT ATTACH TO BEFORE CUTTING. THIS IS IMPORTANT (in any other case, design house will need to reduce all the strains individually somewhat than all collectively).
- Duplicate this for as many tags as wanted.
- Load your paper on the sunshine blue grip mat and cargo your pen into the machine’s clamp A.

- Modify your materials dial to card inventory. If utilizing a heavier weight card inventory you should definitely alter strain.
Meeting
Comply with the academic information on how one can fold the strains. It is extremely vital to observe every quantity as labeled first.
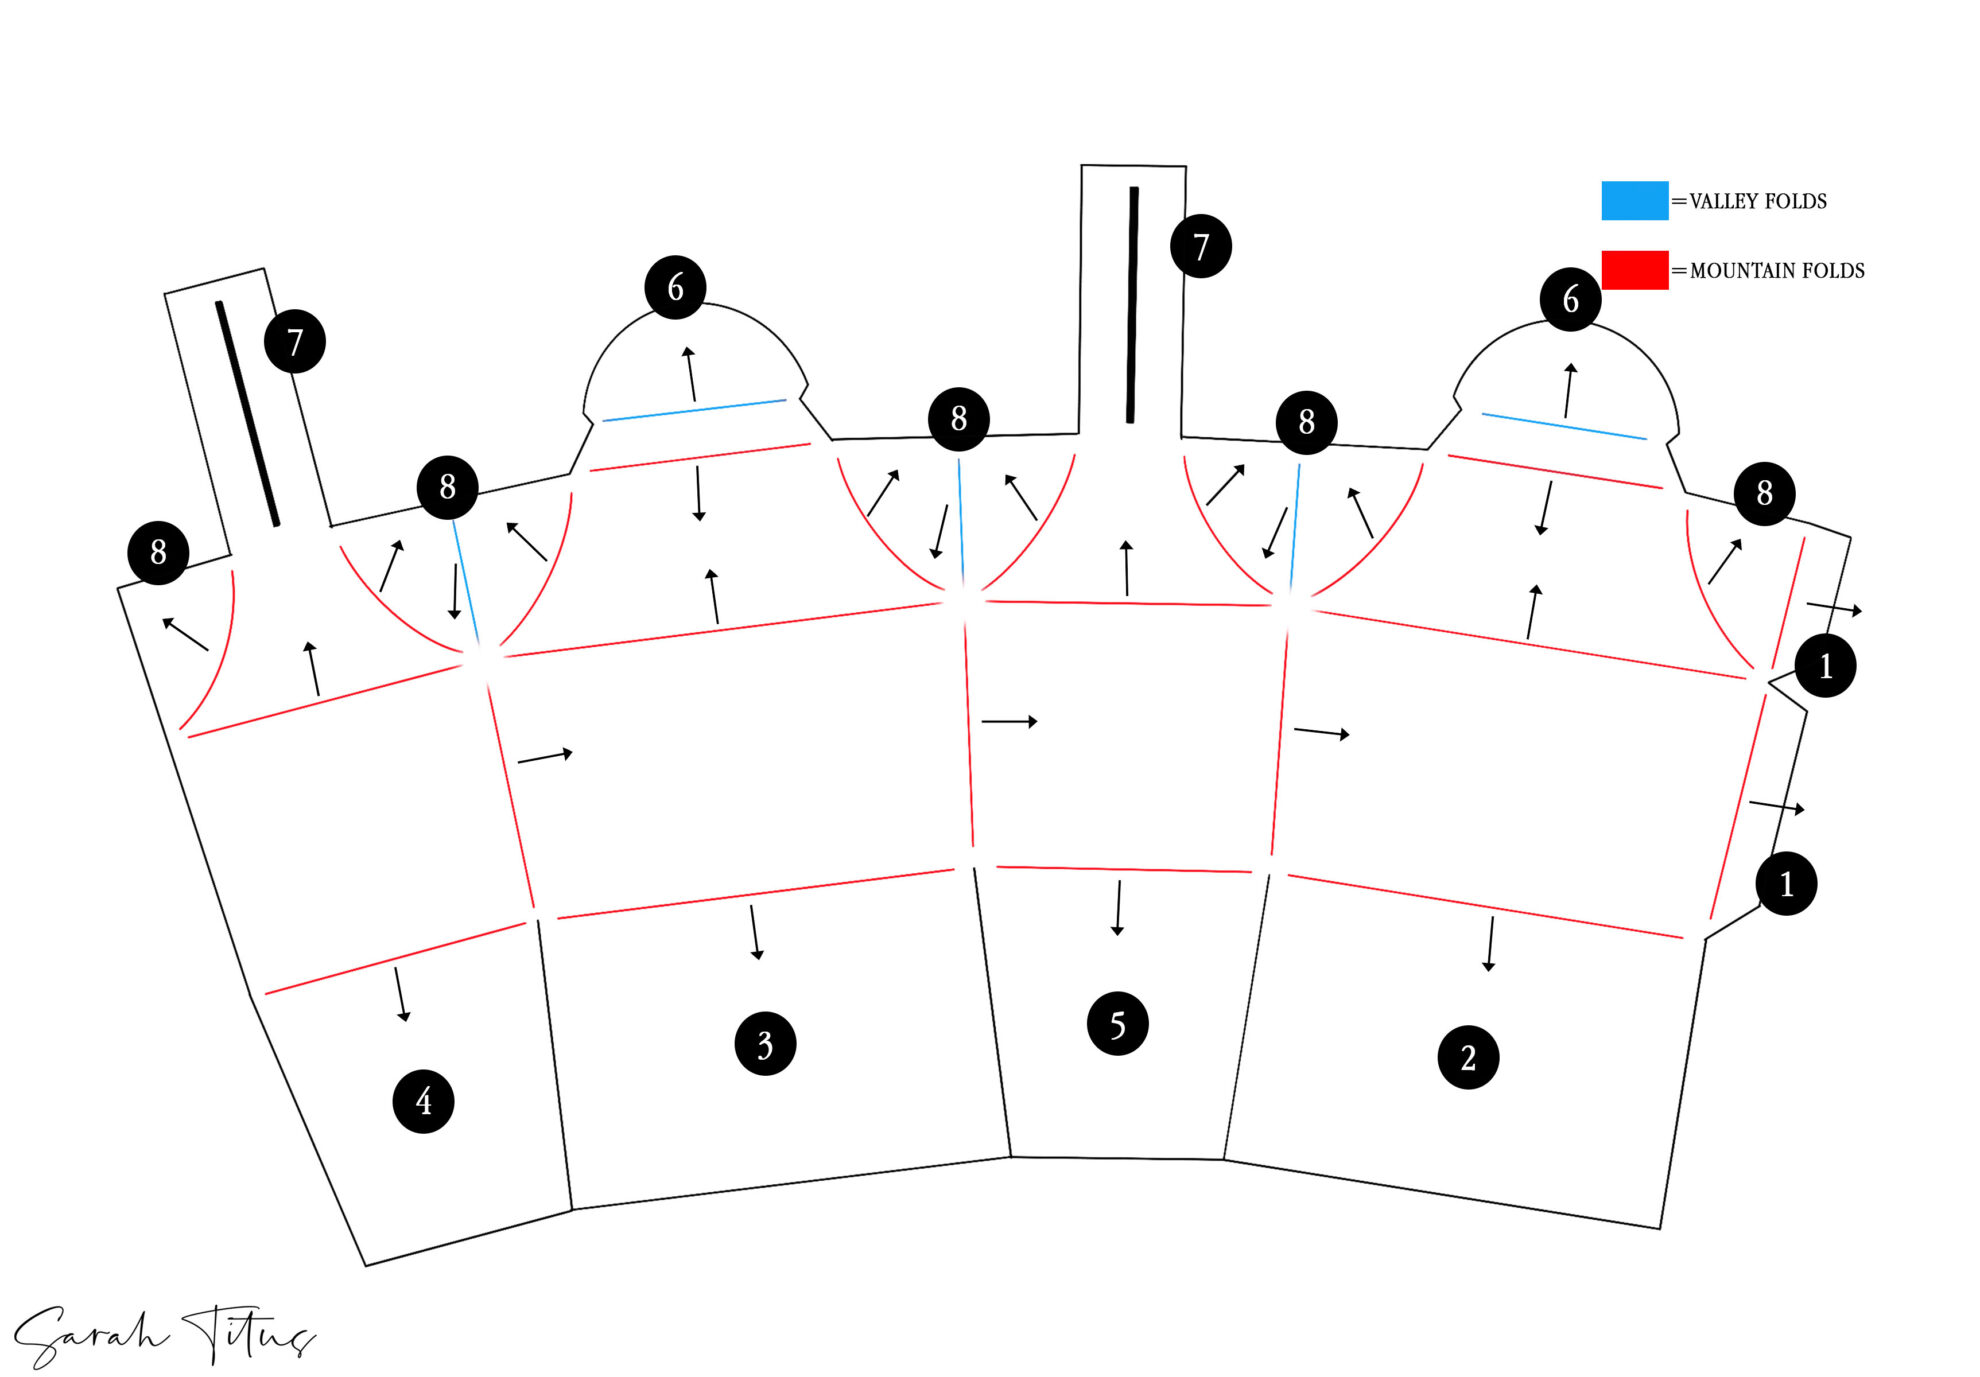
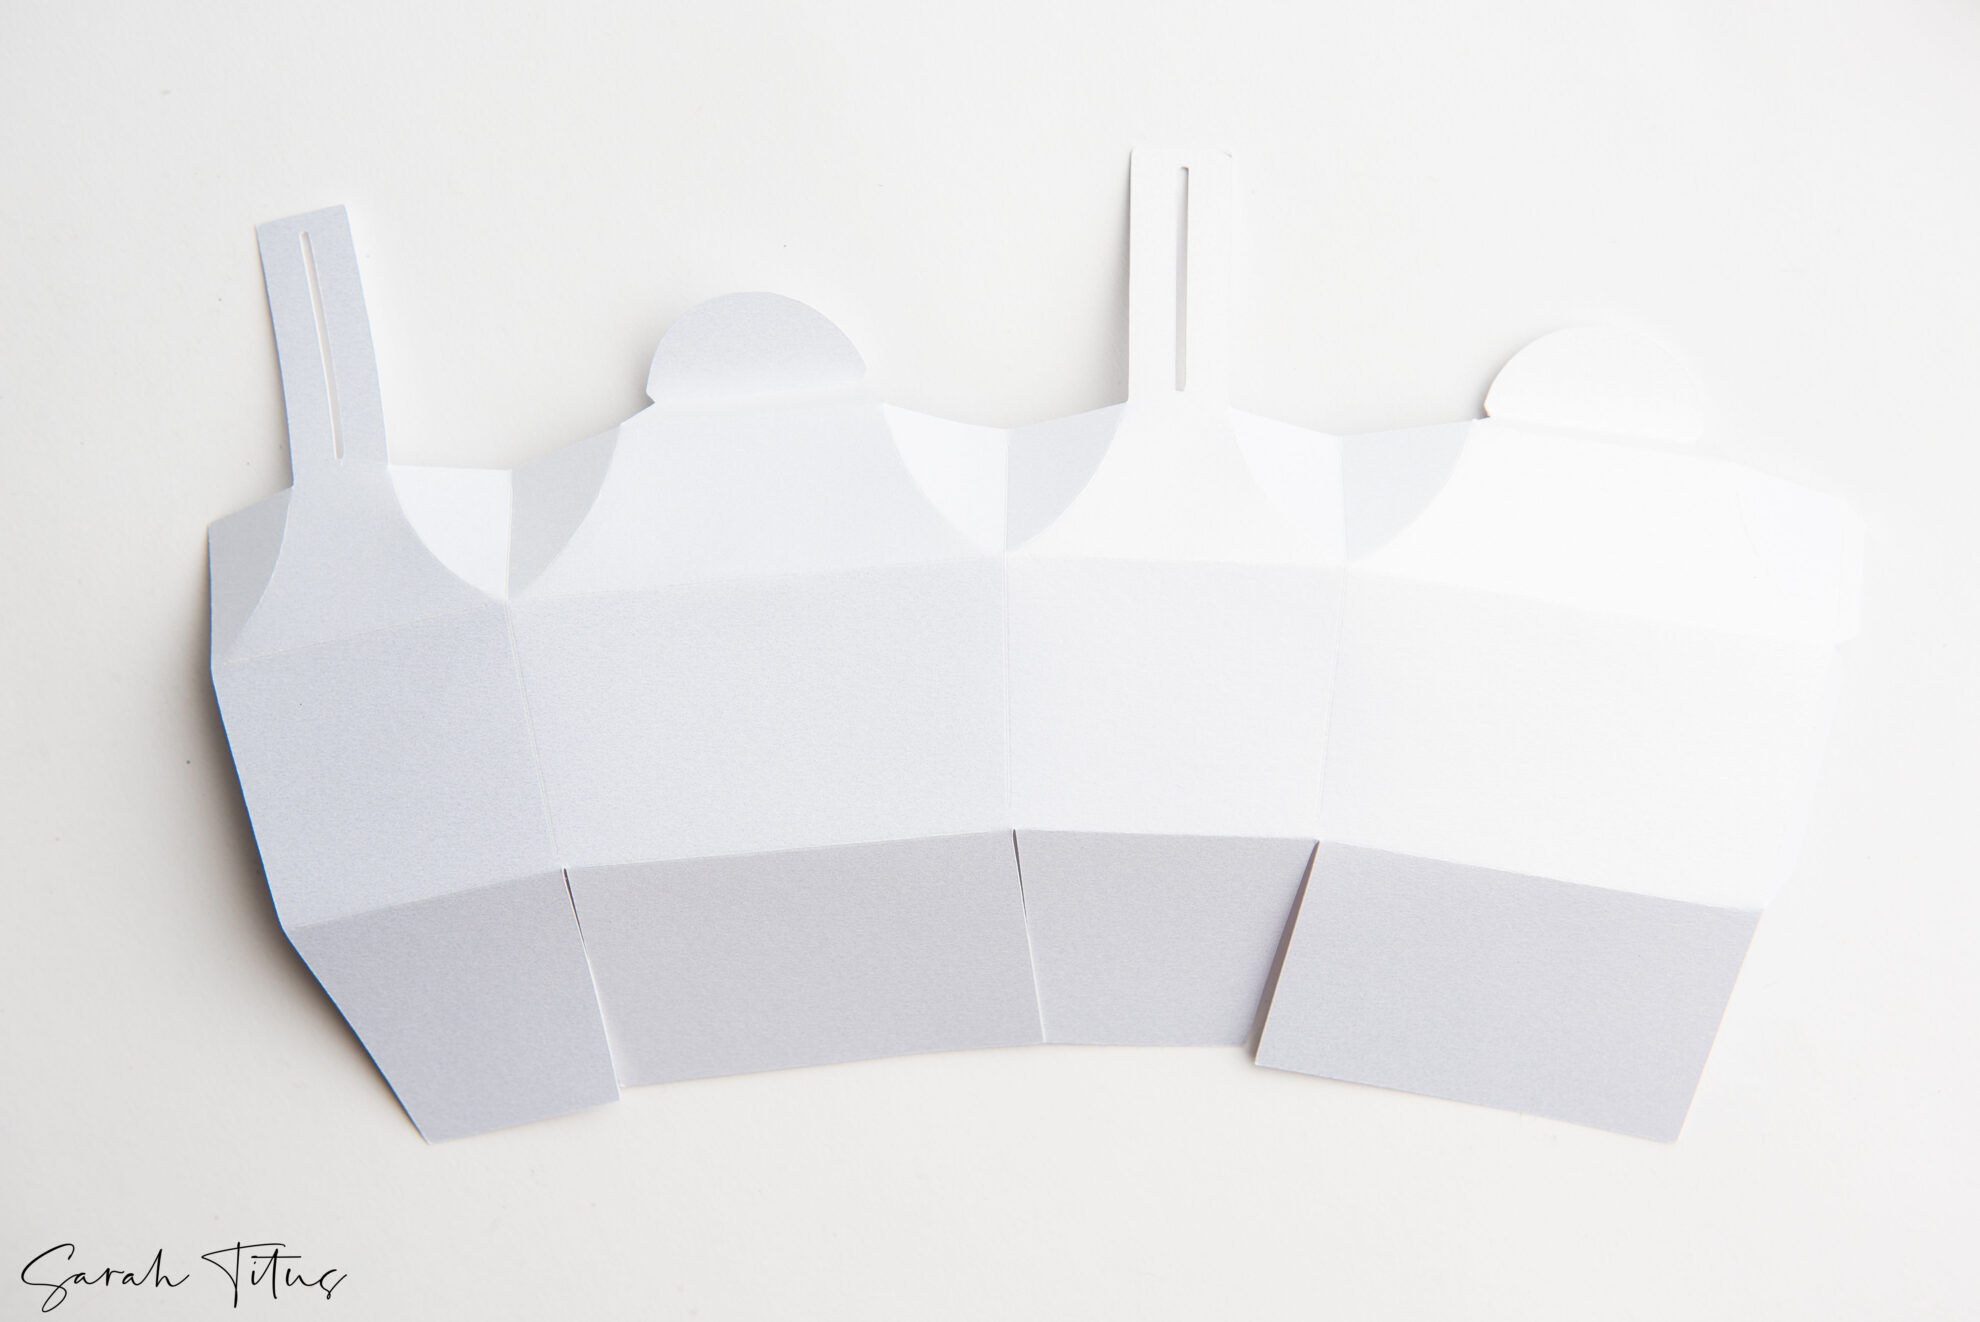
• As soon as your mission has reduce, start to fold all of your strains (see information). The edges of the field (step #8 on the information) when folding can have 2 mountain folds and 1 valley fold within the middle making a fortune cookie impact.
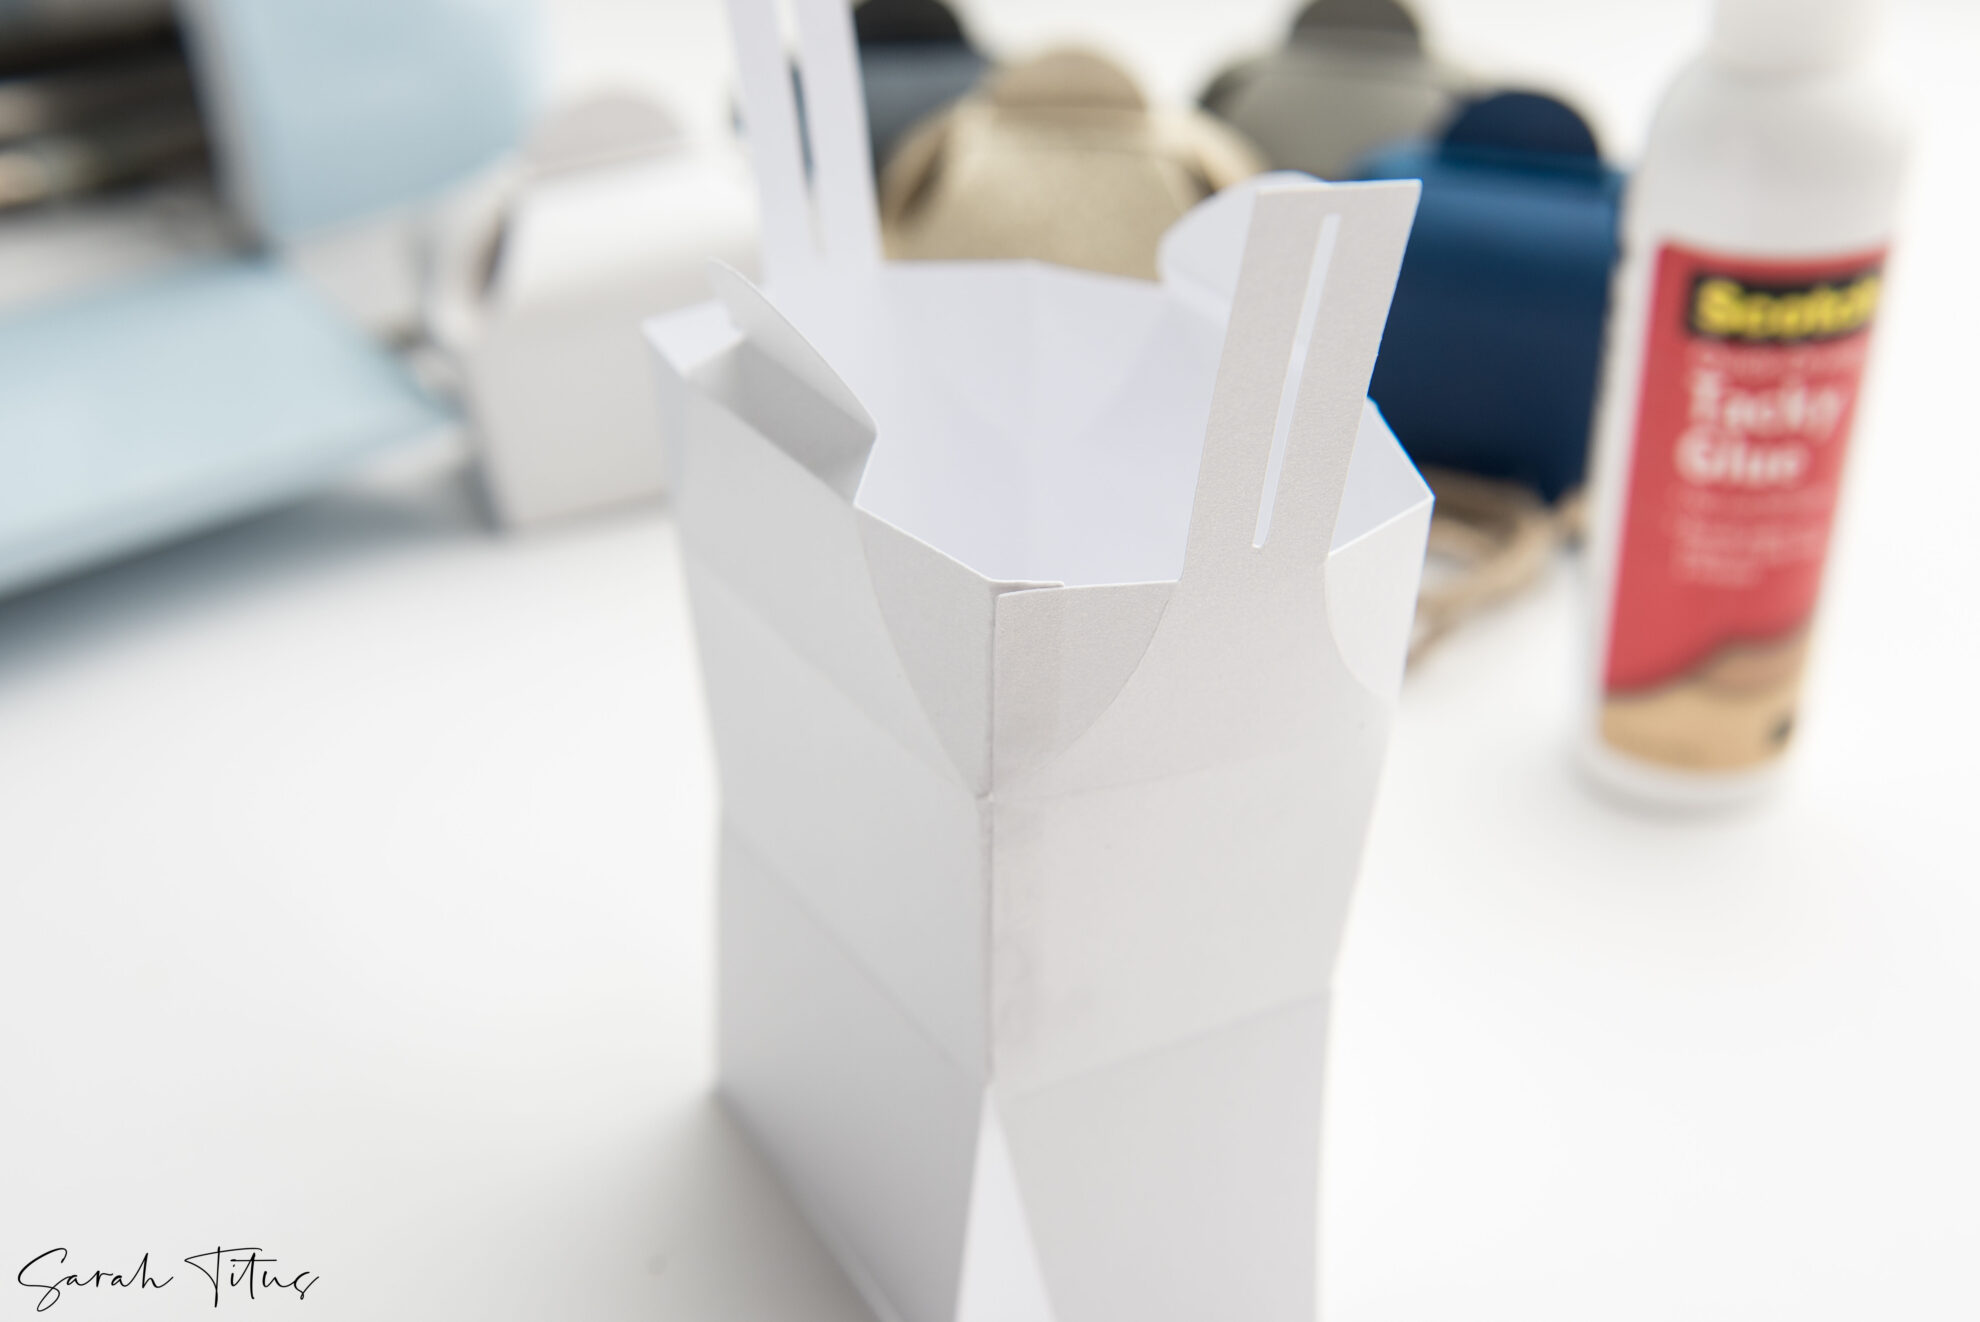
• As soon as folded, start by gluing step #1 to the other facet to kind a field form. Make certain that the rating marks line up collectively to keep away from the field from being crooked.
• Subsequent, fold backside flap #2 inwards and add glue to the highest. Fold backside flap #3 on high. This can start to create the underside of the field.
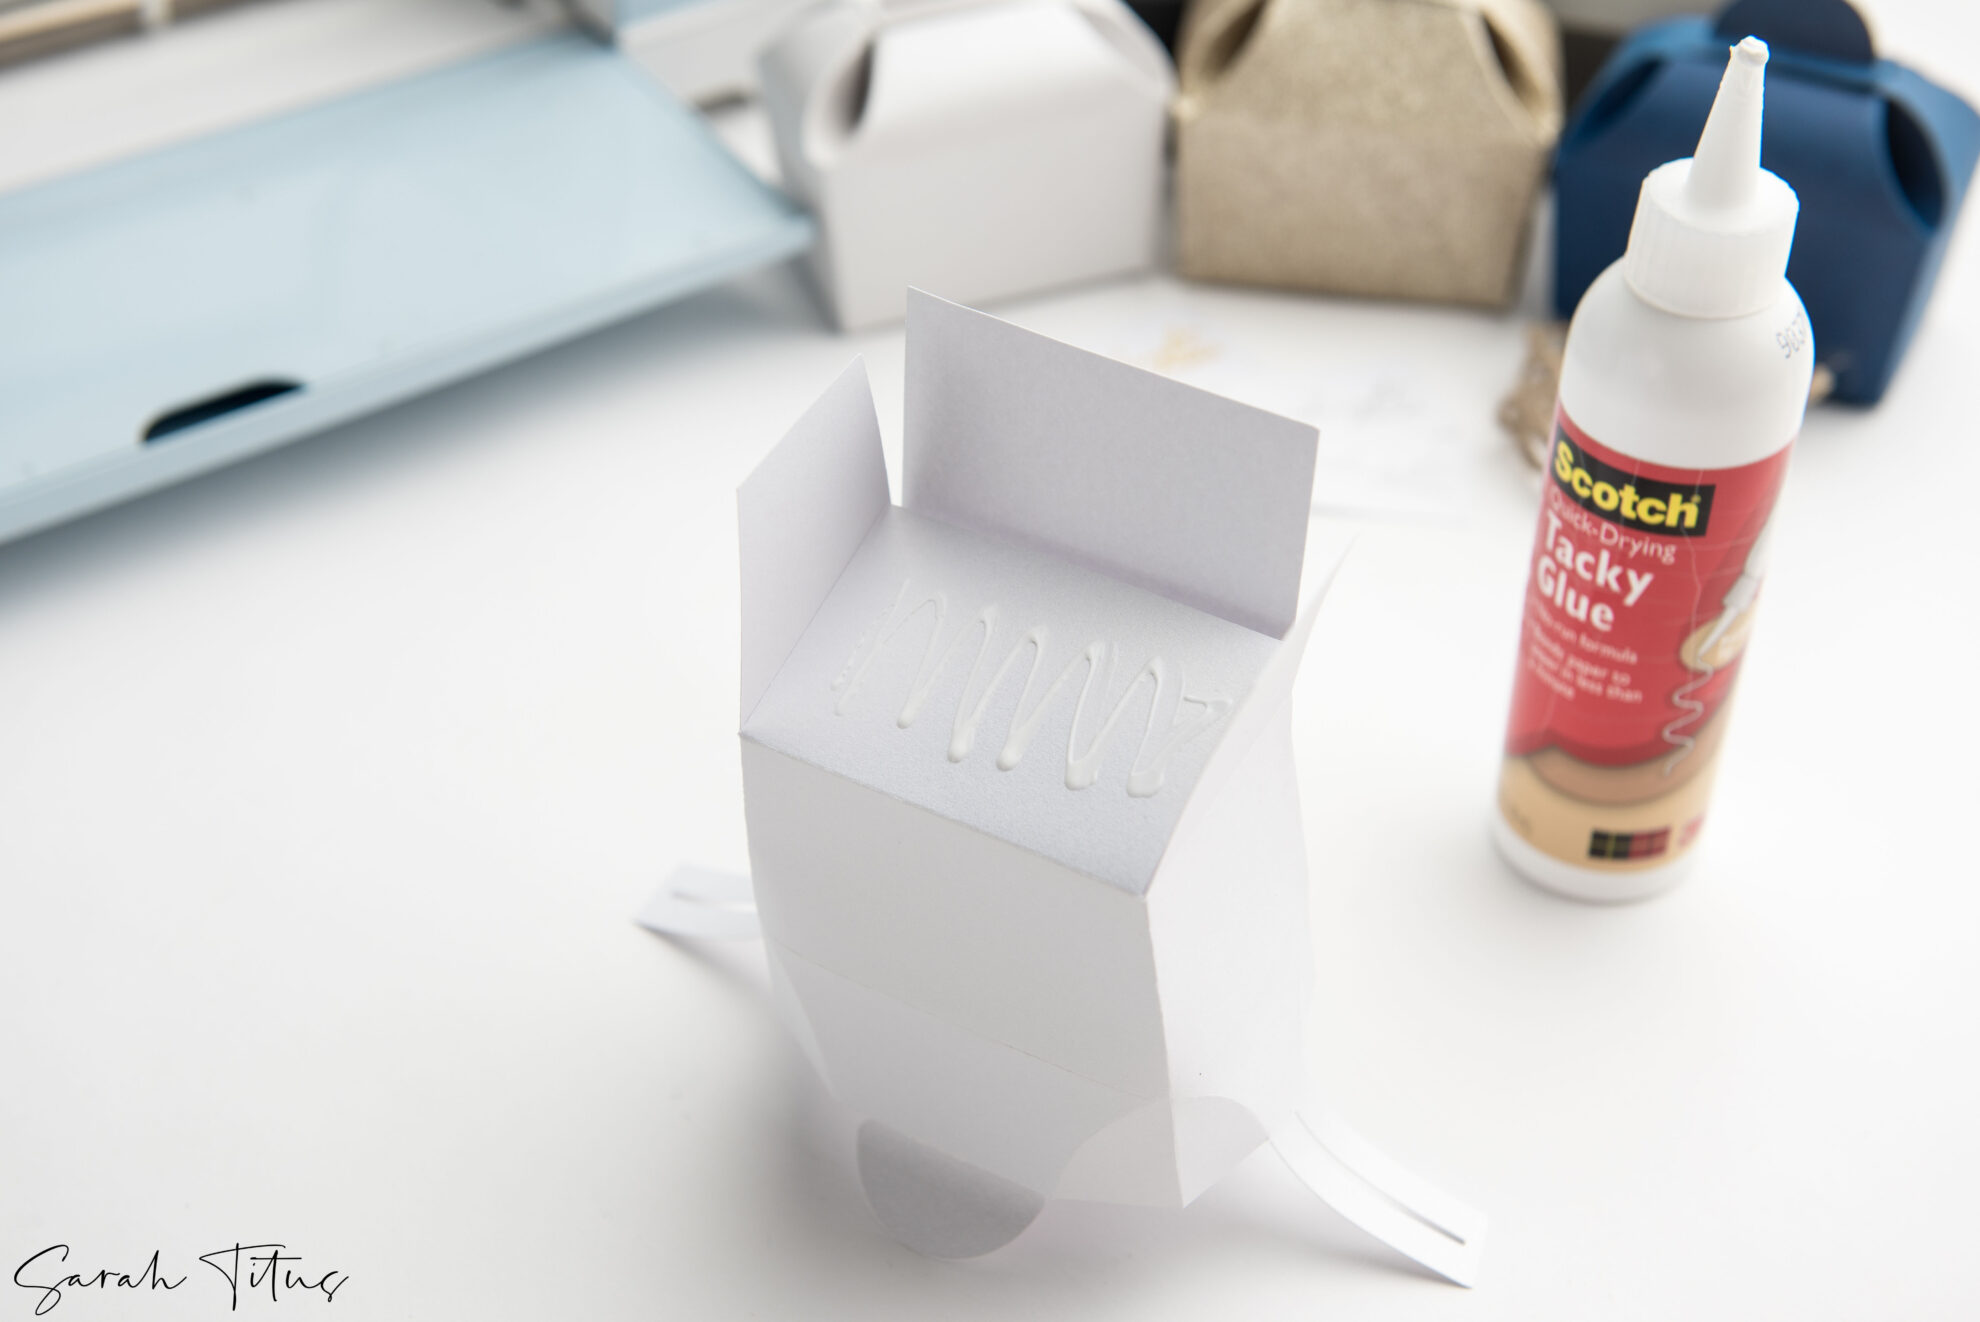
• After, add glue on high of backside flap #3 and fold in backside flap #4. Add extra glue on high of backside flap #4 and #3 whereas folding down backside flap #5. At this level, the underside of the field must be created and capable of maintain objects.
• Let the glue dry and fill your field with some sweet or present.

• To shut, place each pointer fingers and thumbs on all flap #8 and assist the field to break down inwards.
• Seize each flap #6 and maintain them collectively in a single hand as you seize one of many #7 flaps and produce the slit down and over high of each #6 flaps. This can maintain them collectively in place.
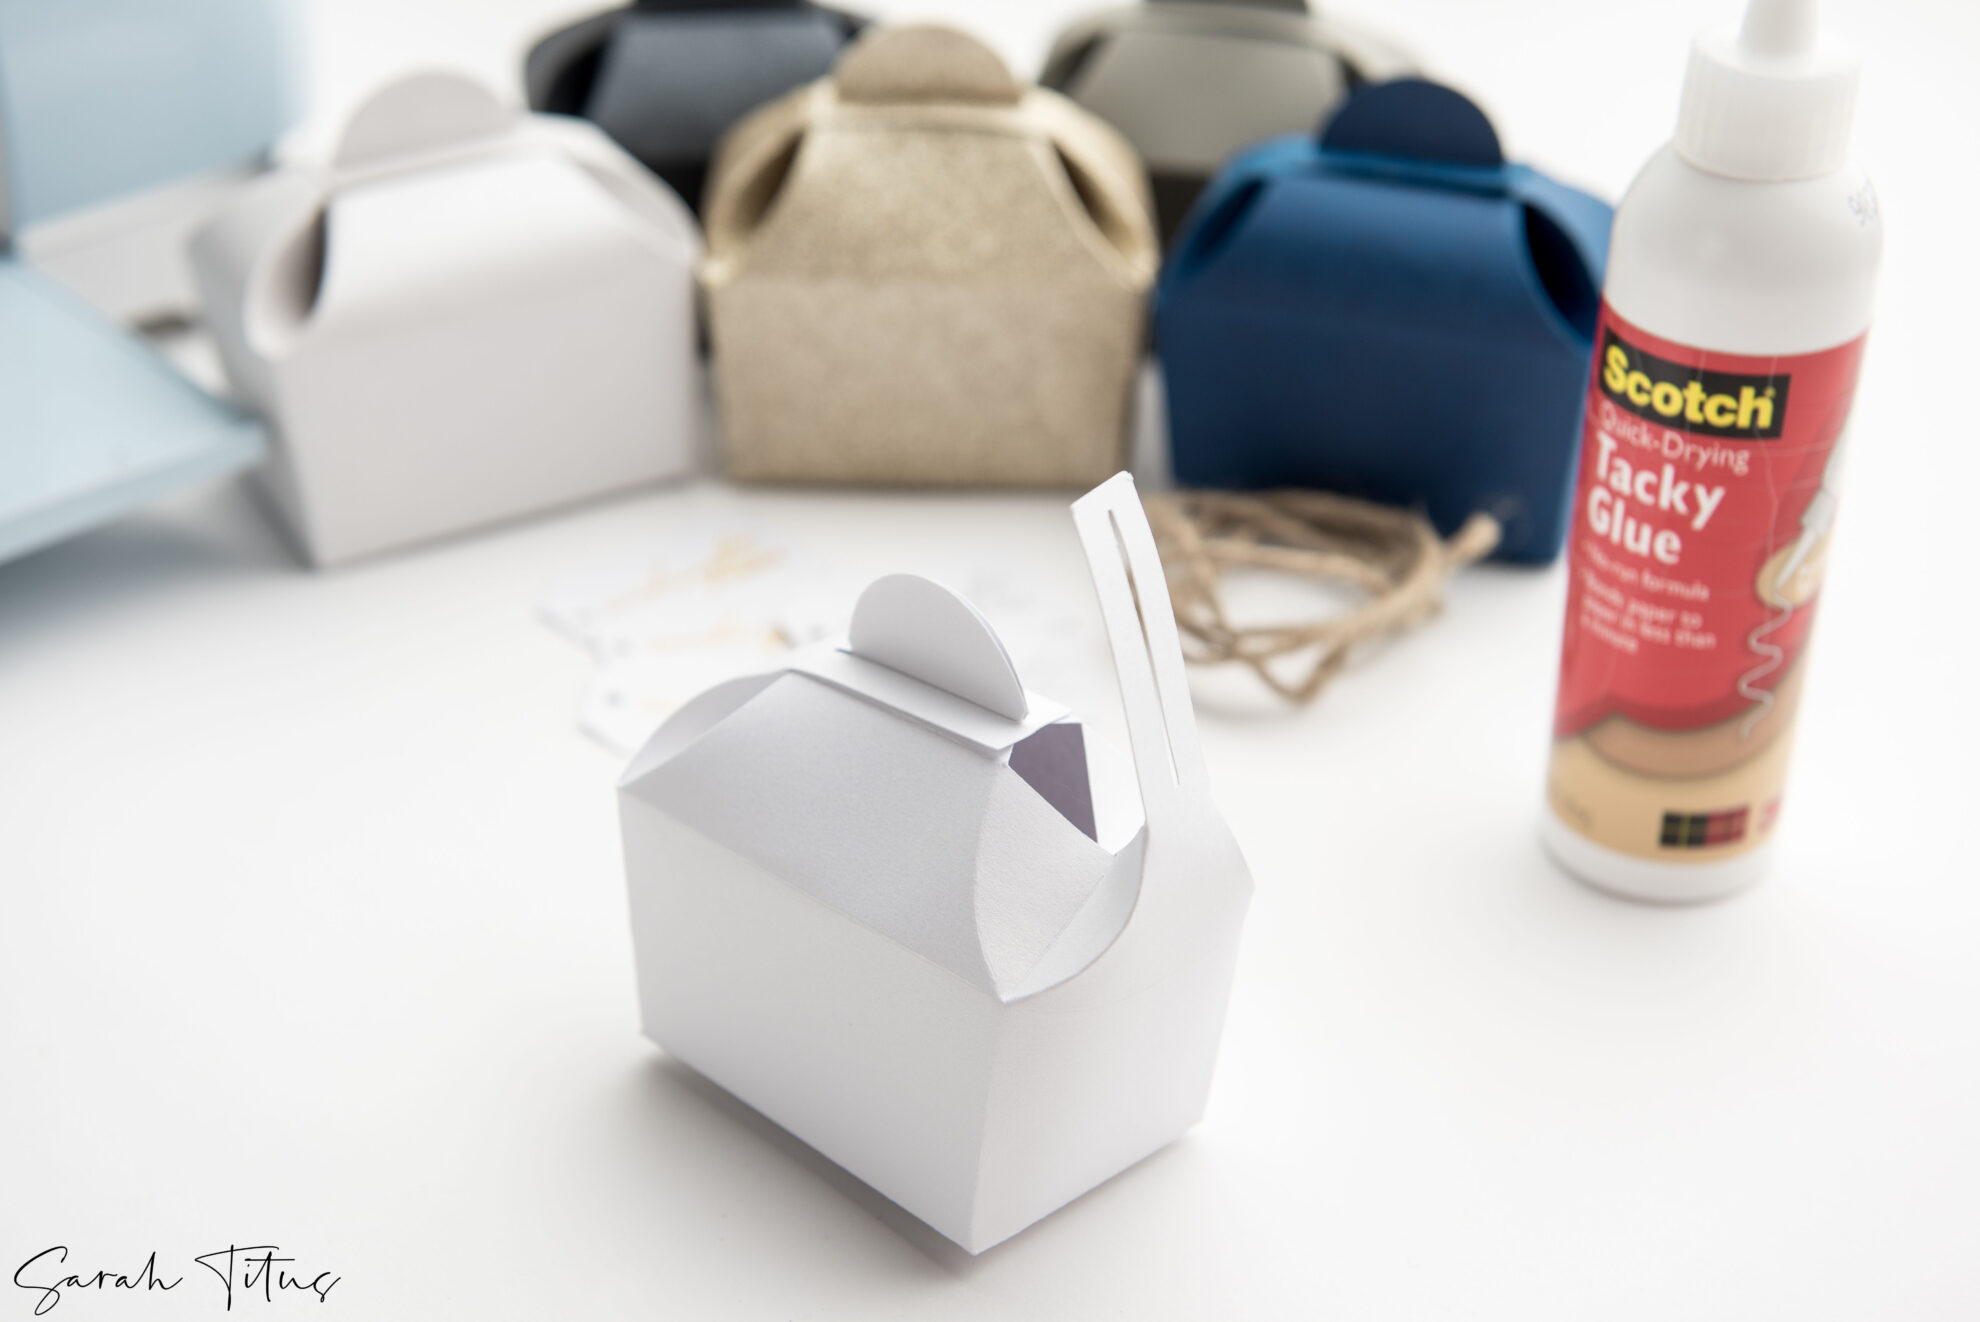
• Earlier than fully closing your field, add a ribbon to your tag and dangle it from the final #7 flap (OPTIONAL). Repeat and produce the final #7 flap down and on high of the earlier flap #7 and each #6 flaps. This closes your field and retains all contents inside like a lid.
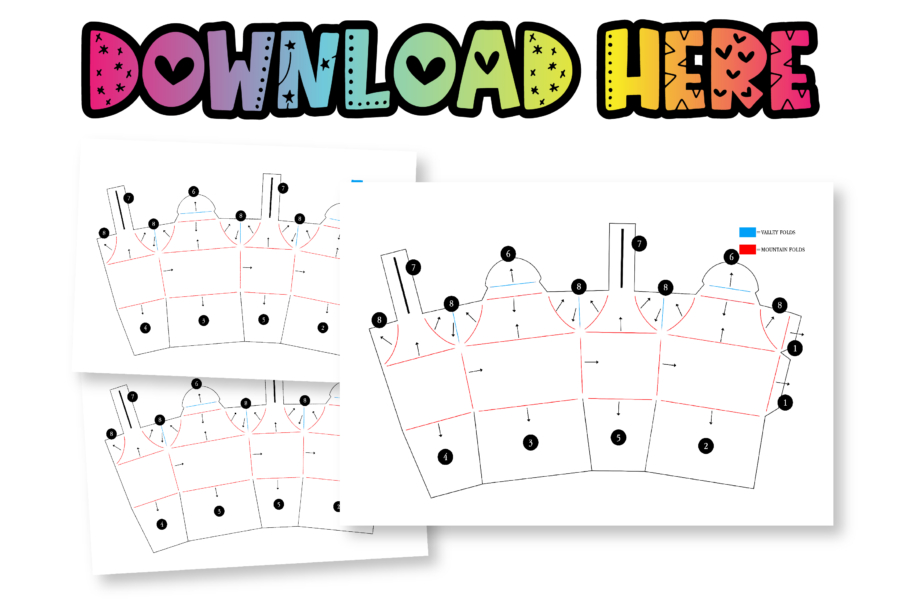
Obtain the cute DIY surprise gift box PDF guide here.
Right here’s the SVG information:
Need assistance importing your SVG into Cricut? Click here to see our full tutorial!